
WordPress custom fields are great for adding extra content to your posts and pages. Enabling them will make it easier to add custom content to your site and improve user experience.
And in this tutorial, we’ll show you the best ways to add custom fields in WordPress.
This guide will cover:
- Manually adding custom fields in WordPress
- Adding custom fields with plugins
- And much more.
Let’s get started:
How to Add WordPress Custom Fields Manually
There are a couple of ways you can add custom fields in WordPress, the manual way and using plugins.
Here’s how to add basic custom fields to posts and pages manually.
Step 1.1 Enabling Custom Fields in Gutenberg
The first step is to switch on the custom fields option in the WordPress editor. This can be done from posts or pages.
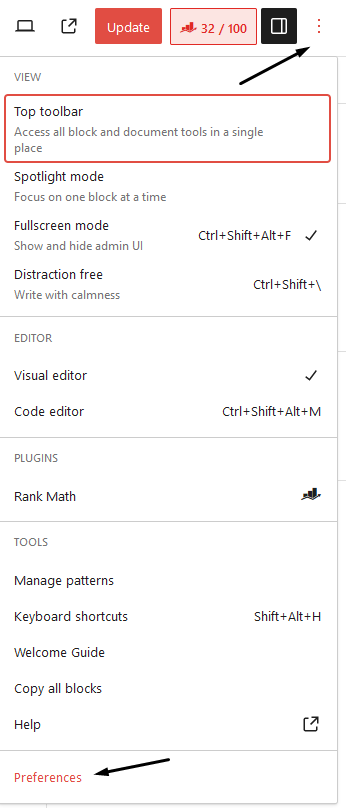
Click on the three dots in the top right corner, then Preferences:
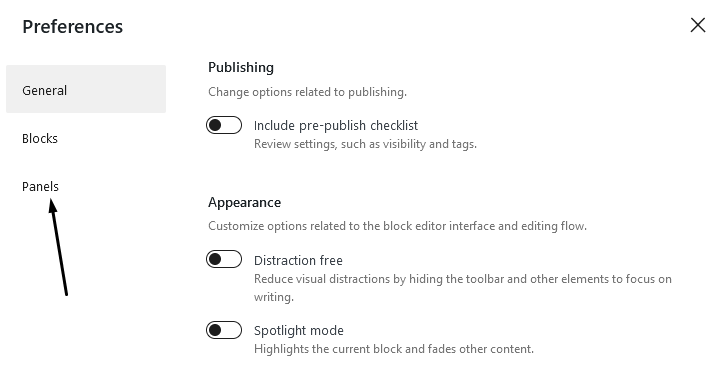
Then click on the Panels option:
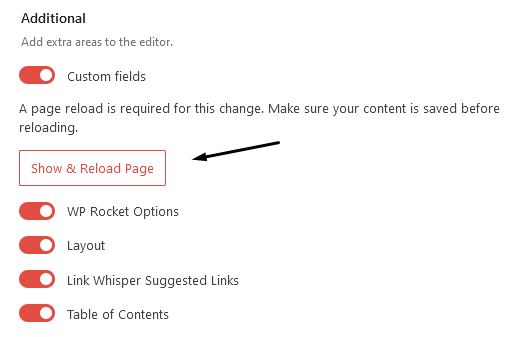
Under the additional settings, you’ll see the option for custom fields. Toggle this on and then click on the Show & Reload Page button:
The page will automatically refresh to activate the custom fields:

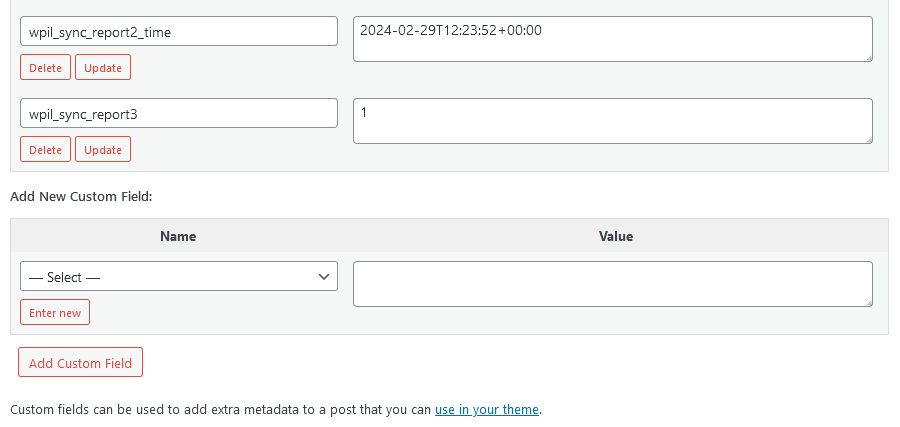
Scroll down in Gutenberg, and you’ll see the custom fields section:
Step 1.2 Enabling Custom Fields in the Classic Editor
If you’re using the classic editor plugin, here is how to enable custom fields.
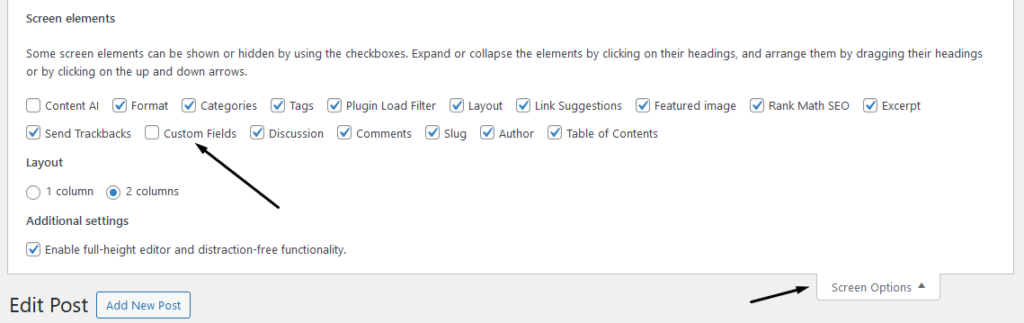
Open up a new WordPress post or page or edit an old one. At the top of the screen, you’ll see the Screen Options tab, click on it and then select Custom fields from the options:
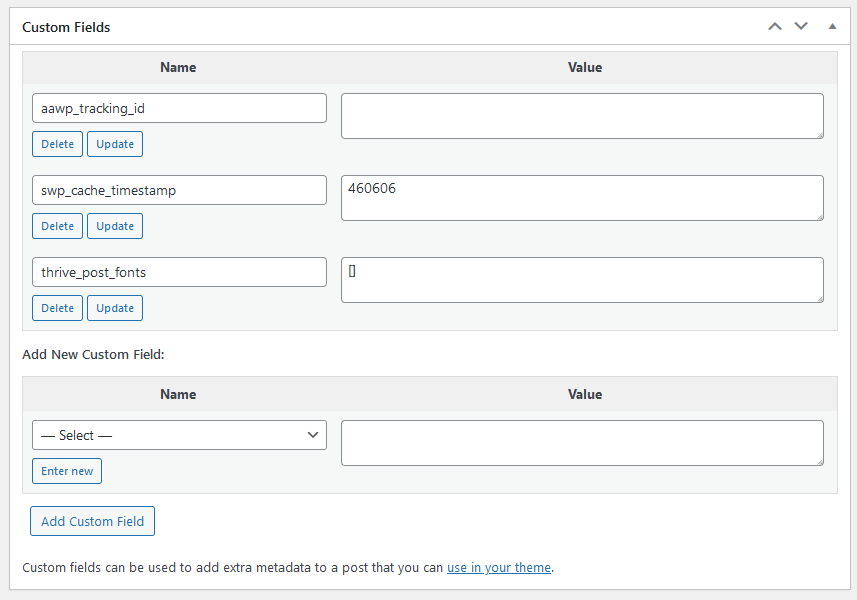
Scroll down in the classic editor to find the Custom Fields section:
Step 2. Creating a WordPress Custom Field manually
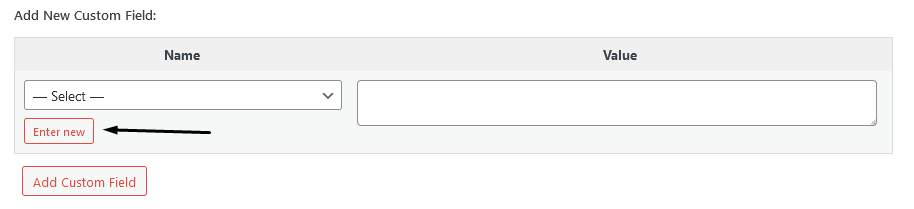
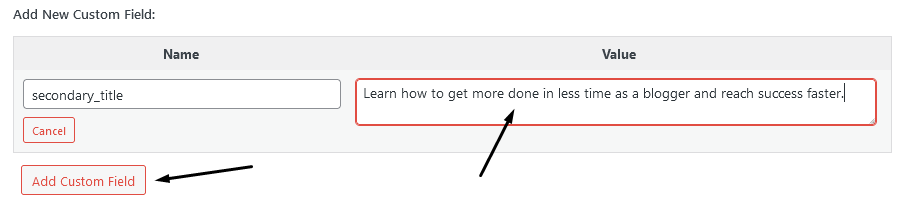
Now it’s time to create a custom field. In this example, I’m going to add a secondary title.
Under Add New Custom Field, click the Enter New button:
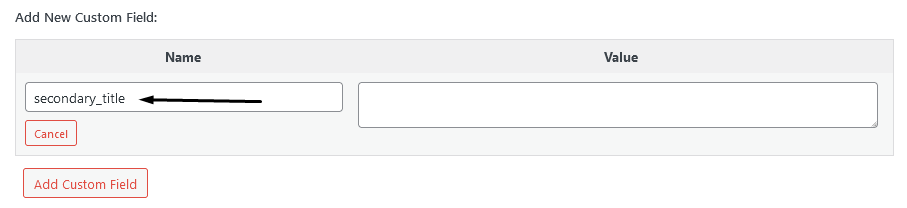
Then give your custom field a name, adding an underscore between words:
Enter the custom field value and click on the Add Custom Field button:
Step 3.1 Displaying a Custom Field in Your Theme
To display your custom fields in the front end, you have a few options. The first method is to add code to your theme.
This method should only be used if you know what you’re doing, or at the very least, save a backup of your WordPress website before continuing.
To add the code to your WordPress theme, first, make sure you’re editing a child theme and not the main theme.
Navigate to your files in the theme editor, find the single.php, and add this code:
<?php echo get_post_meta($post->ID, 'secondary_title', true); ?> Just change the ‘secondary_title‘ text with your custom field name.
The structure of your theme and the custom field you created will depend on where you need to add the code.
Step 3.2 Displaying Custom Fields Using Hooks and Code Snippets
Another way to add your custom fields to your theme is by adding code snippets to your theme’s function.php file or using a Snippets plugin.
Hooks allow you to add code in specific areas of your theme’s pages or posts. Filters help target specific locations on the page, for example, directly after the main title.
Here’s the code snippet I would use to add my secondary title custom field after the title:
function add_secondary_title_after_default_title($title, $id = null) {
if (is_single() && in_the_loop()) {
$post_id = $id ?? get_the_ID();
if ('post' !== get_post_type($post_id)) {
return $title;
}
$secondary_title = get_post_meta($post_id, 'secondary_title', true);
if (!empty($secondary_title)) {
$title .= '<br><div class="secondary-title">' . esc_html($secondary_title) . '</div>';
}
}
return $title;
}
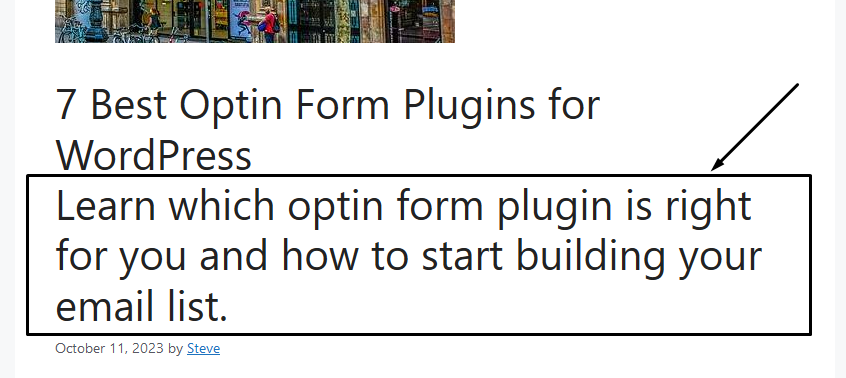
add_filter('the_title', 'add_secondary_title_after_default_title', 10, 2);This code is saying IF the page you’re on is a single post and it’s inside the loop, check if the secondary_title custom field exists.
Then if it does, add the custom field after the title inside a <div> tag.
Here’s what it looks like:
We can also target the div class with some CSS to customize the style of the text. Here’s some CSS I added to the additional CSS in the customizer:
.secondary-title {
  font-size: 28px;
  font-style: italic;
  line-height: 1.4em;
}
Here’s the result:

That’s it. You can adjust your styling to however you want your custom fields to look.
Step 3.3 Displaying Custom Fields with Block and Page Builders
This next method for adding custom fields in WordPress is to use a special feature in some premium themes.
It’s similar to adding custom code in the previous method, but it’s built into the theme and is less technical. Plus it gives you way more control and is more user-friendly.
In my example, I’m using GeneratePress Pro and the Elements add-on. Elements in GeneratePress Pro lets you create template layouts, hero headers, template blocks, and hooks.
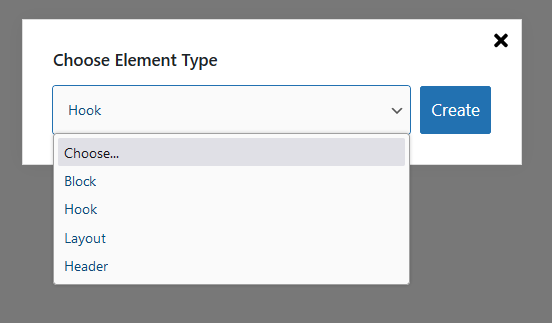
To add your custom field using this feature, select the Hook option. You’ll see a field you can add the code to, hook settings, and display rules:
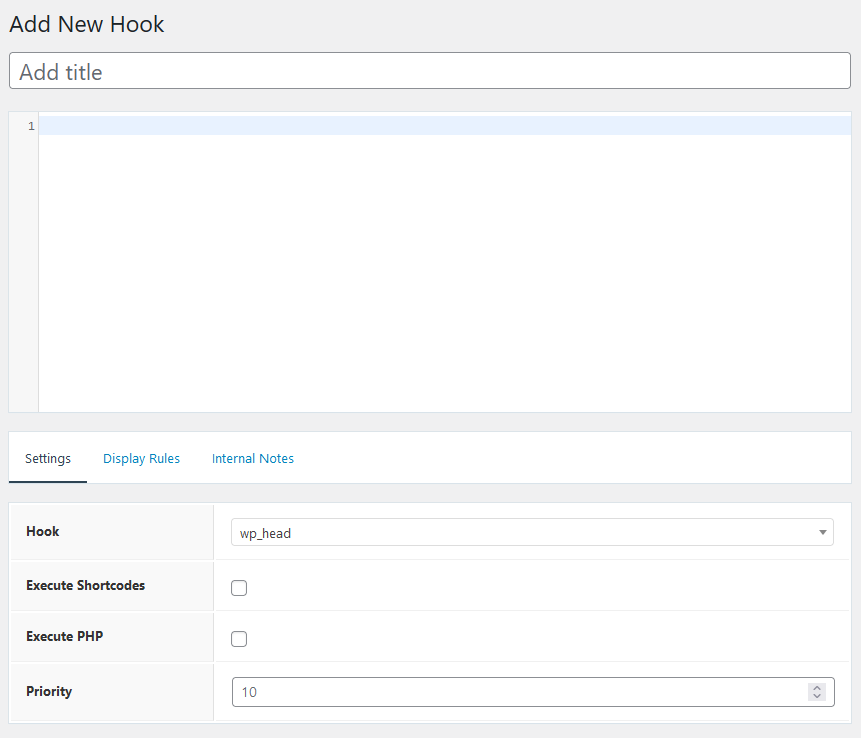
Fill out the boxes that relate to your custom field:
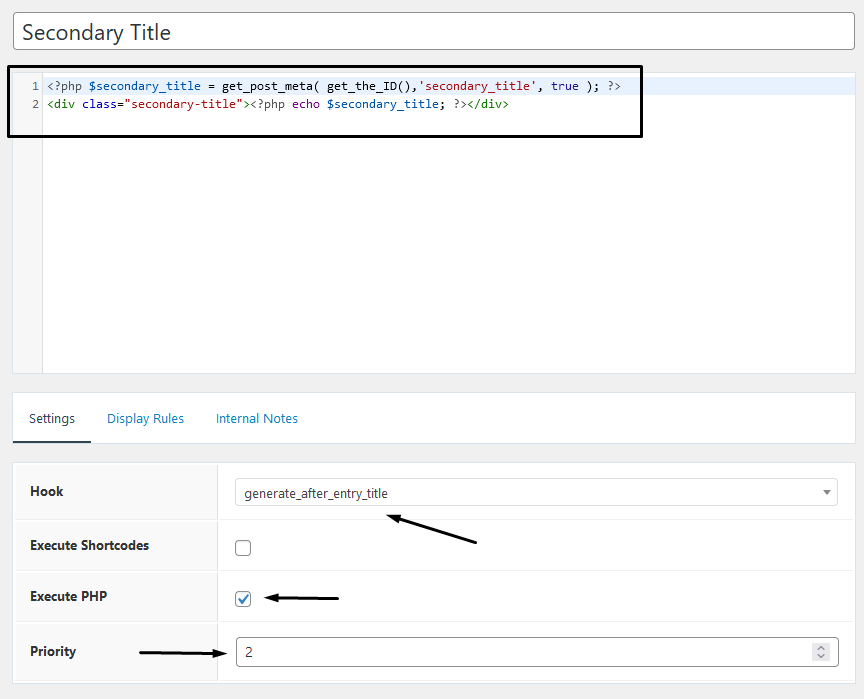
This includes:
- A title to describe your hook
- The code for the custom field
- The hook to define the location it will show in your theme
- Check Exucute PHP
- And setting the priority.
In my example, the code creates a variable called ‘secondary_title‘ which calls in the custom field. I then display the custom field by calling the variable with echo and placing it inside the div class.
The GeneratePress forum can be extremely helpful in these situations.
The result is the same as the previous method, only less code was needed:

Now that you’ve learned how to add custom fields in WordPress manually let’s look at a more advanced way of creating custom fields.
How to Add WordPress Custom Fields with a Plugin
In the previous section, we added custom fields using the built-in custom fields feature on the editor, but there is another way.
Using a WordPress plugin called Advanced Custom Fields, we can add fields to any post type without the need to declare its name every time.
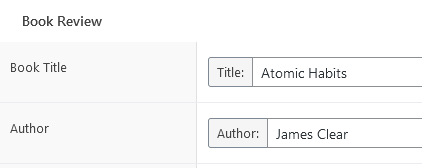
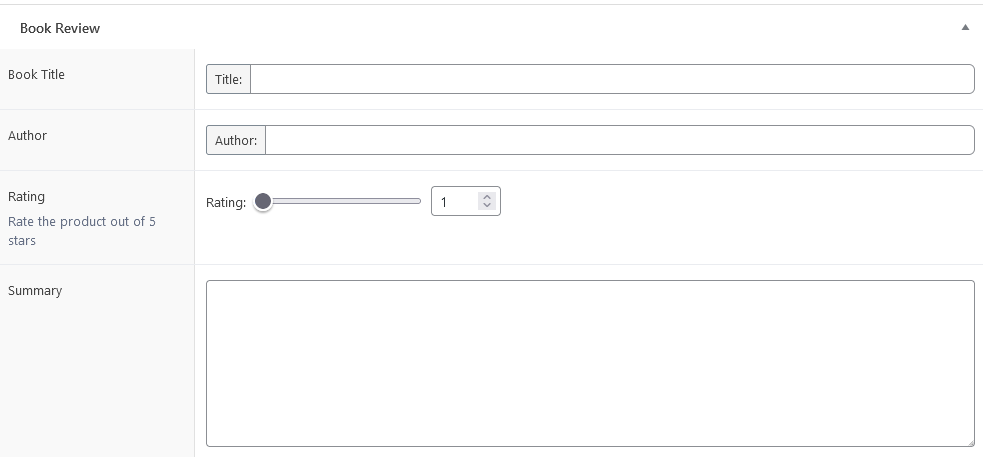
Here’s an example of some book review fields I created:
Here’s how I did it.
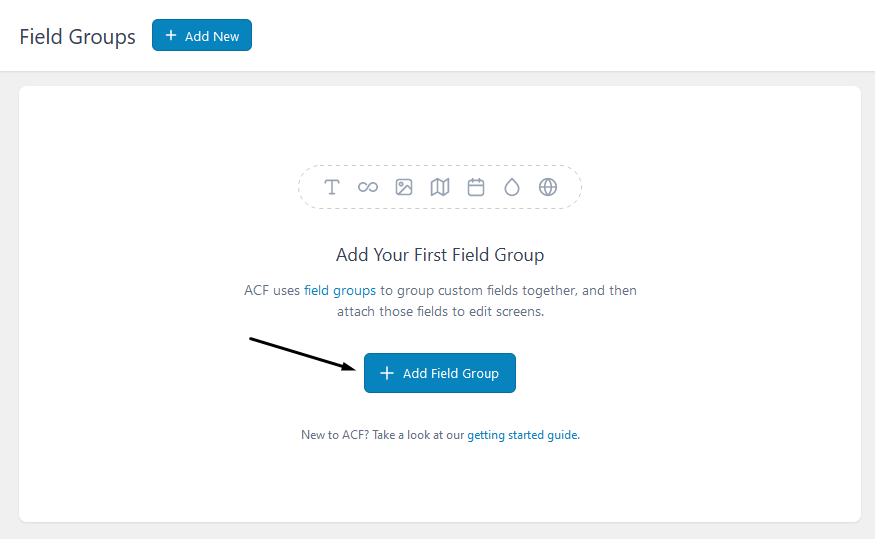
First, download and install the Advanced Custom Fields plugin and create a new field group:
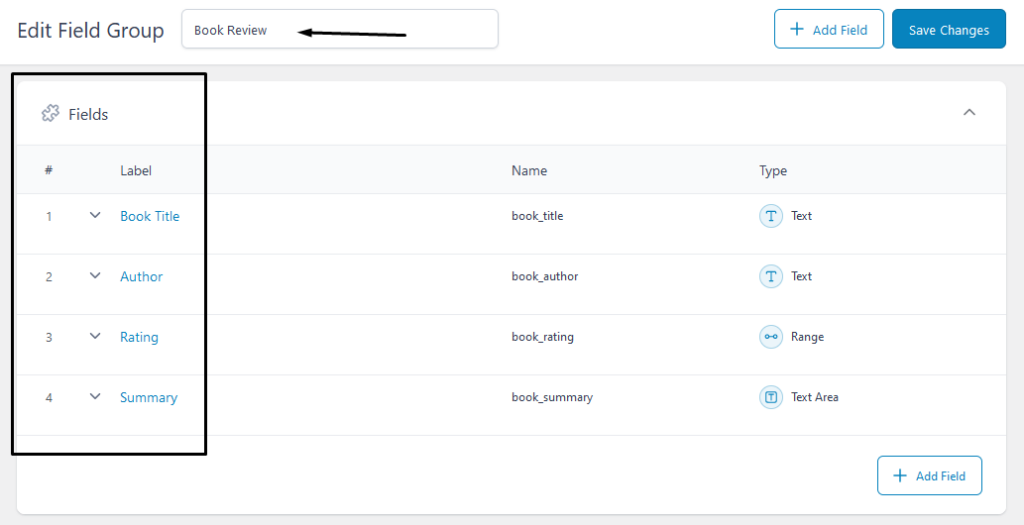
Give your custom fields group a name and start adding the fields you need.
In mine, I’ve added:
- Book title
- Author
- Rating
- Summary.
Each field has different options, such as field type, label, and field name:
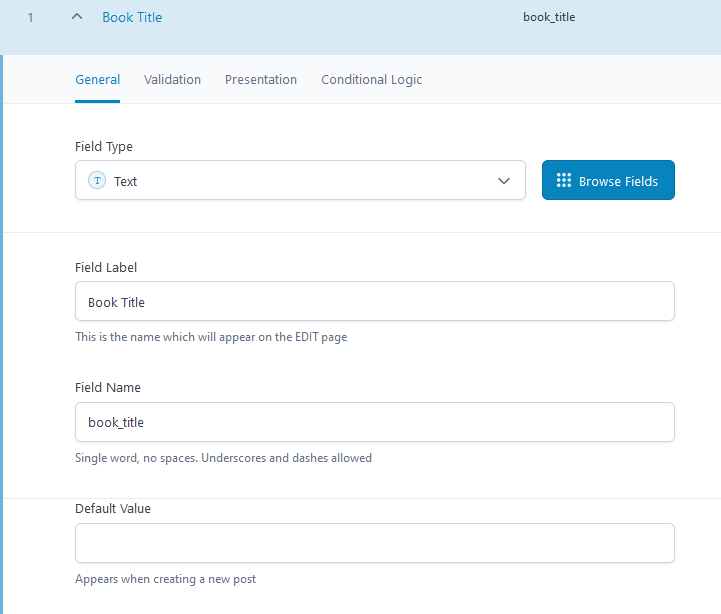
For example, the book title and author are text fields and the book summary is a text area. This determines how much space or content can be added inside the editor:
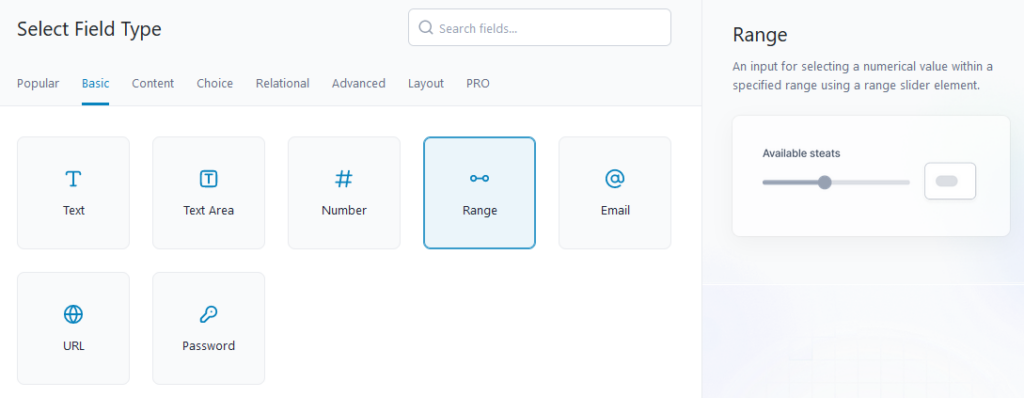
For the rating, I used the range field type. This creates a slider element to choose the value as the rating:
The settings at the bottom let you define where this custom field group will show:
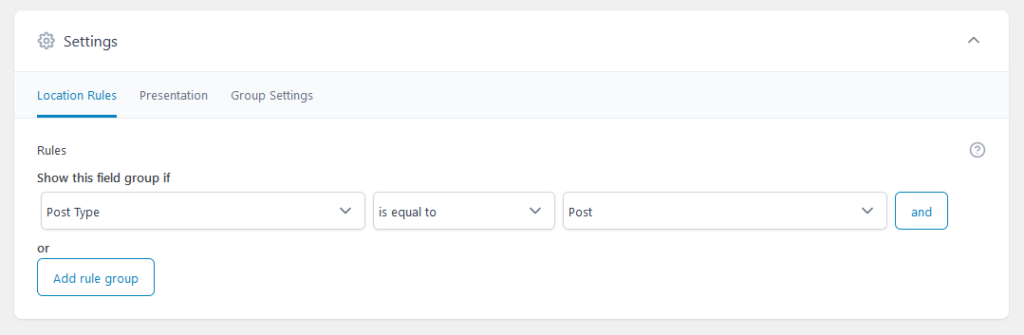
I’m adding mine to the default posts type, but a book reviews post type would work well here.
You can save your custom field group and create a new post. Scroll to the bottom, and you’ll see your custom fields:
Now you need to decide how you’ll display them on the page. The easiest way to display them is using shortcodes like this:

The shortcode for Advanced Custom Fields looks like this, you just need to add your own field name:
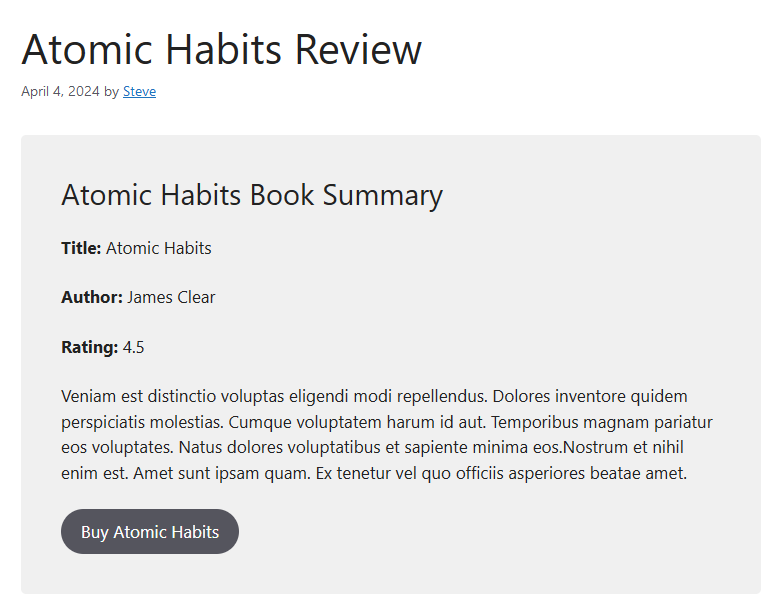
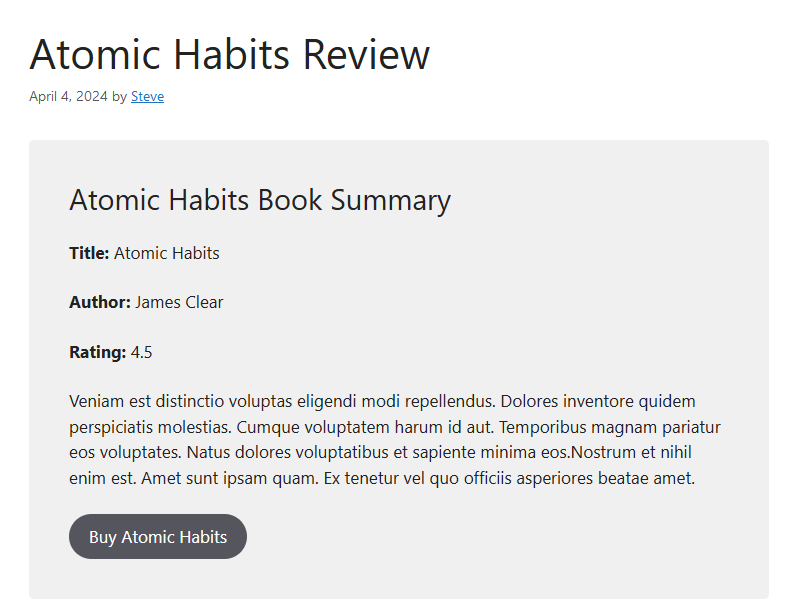
[acf field="book_title"]I added some HTML and a label surrounding the shortcode so that I could style the text and make things clearer on the front end.
I also added a button with a link to the book and grouped everything inside a gray group block to make it stand out.
Here’s what it looks like in the post:
That’s it! To add code directly to your theme, you can refer to the manual steps above or watch this fantastic tutorial and playlist on YouTube:
3 WordPress Custom Fields Plugins
So far, I’ve shown you how to add custom fields using code snippets or the free version of the Advanced Custom Fields plugin.
But what are some other options that can further assist you in building custom fields in WordPress?
Here are a few other tools for you to look into.
Advanced Custom Fields Pro
In the free version of ACF, I showed you some of its basic features, which might be good enough for some use cases.
However, the pro version opens up a ton of possibilities for complex website builds.
- Extra fields. Get access to way more fields such as gallery, clone, flexible content, and repeater field.
- ACF Blocks. Lets you build your own Gutenberg blocks with integrated custom fields you create in ACF.
- Option pages. Build custom options pages in the admin that puts custom fields with universal settings in one place.
- Import and export. Import or export custom field groups to save time across multiple projects.
- More customizations. Gives you more control over customizations with PHP and JS actions and filters
ACF Pro has been a favorite custom field plugin in the WordPress community for many years. You can get the premium version for as low as $49 per year.
Meta Box
Meta Box is another handy plugin for helping you display your custom fields inside visually appealing meta boxes.
This plugin is great for developers who prefer to keep their site lean by adding custom fields and post type code directly to their functions.php.
There are a ton of free and paid extensions for even more features.
Some include:
- Comment Meta: Add custom fields to WordPress comments.
- Custom post types and taxonomies: Let you add a custom post type and custom taxonomy.
- Relationships: Make connections between posts and pages and the custom fields you create.
- MetaBox Blocks: Create your own Gutenberg blocks with PHP.
- Meta Box Builder: Use a drag-and-drop builder to create custom meta boxes and custom fields in WordPress.
- Conditional logic: Create visually dependent meta boxes and custom fields for a better user experience.
The free version of Meta Box and its free extensions offer plenty of features, but you can get a premium license with even more features starting at $49 per year.
Custom Post Type UI
Custom Post Type UI is a plugin that lets you create and manage custom post types in the WordPress admin.
Instead of coding them yourself, it uses a user-friendly interface that anyone can use to add custom post types.
Need a portfolio for your work? How about a product review post type? No problem.
This plugin also goes hand-in-hand with ACF and Meta Box, as you can add custom fields and meta boxes to the post types you create.
Custom Post Type UI offers most of its features for free, with its extension to help you display your data easily.
Custom Fields in WordPress in Conclusion
WordPress custom fields are a great way of adding extra content to your site more efficiently. It can also improve user experience and increase user engagement.
Following this complete guide makes adding custom fields in WordPress a breeze. You can also use some of the plugins mentioned to streamline your process.
For more, read our WordPress tips post to make the most out of your WordPress site.