
WordPress migration or moving WordPress to a new host doesn’t need to be overwhelming.
When you simplify the process, it can be easy and stress-free.
In this post, I’ll show you how to migrate your WordPress site, step-by-step.
Let’s get started.
If you need to choose a hosting provider, I recommend Iridium Hosting. Their managed servers are optimized for WordPress sites, and they use SSDs for better performance. Plus, they will migrate your WordPress site for you at no extra cost.
WordPress Migration Prerequisites: 5 Important Things to Do First
Before migrating WordPress to another host, there are a few things you need to do first. Some of these are essential and will save you a lot of time later.
- Choose a new web host. First, you need to choose a new WordPress hosting provider. If you haven’t chosen one yet, I recommend Iridium Hosting as they will migrate your site for you, and it’s fully managed and optimized for WordPress.
- Take a backup. Before making any changes, it’s a good idea to take a backup of your files and database through your hosting platform. This will ensure you have a copy saved if anything goes wrong.
- Clean up your site. Cleaning up your site involves removing plugins and themes you no longer use. This will save you valuable time when transferring data as there will be less to copy. You could also use WP-Optimize to clean up your database tables, but this is optional.
- Install WordPress. If you’re using a WordPress plugin to move your site, then you’ll need to install a clean version of WordPress on your new hosting account. If you’re manually migrating your site, there’s a faster way to do this which I’ll show you how in the manual steps.
- Adjust the settings. Make sure the new installation doesn’t have any caching plugins installed, as this can interfere with the migration process. You may also want to take note of your site’s current settings so you can compare them once it’s installed on the new hosting. This will give you peace of mind that everything has been copied over correctly.
Those are the prerequisites of WordPress migration. Now you’re ready to move WordPress to your new hosting account, either with a plugin or manually.
How to Migrate A WordPress Site Using a Plugin
Migrating WordPress using a plugin is the easiest method, so I’ll start here and show you how to do it manually later in the post.
Many WordPress migration plugins will do the job, but I’ll be using Backup Migration by Backup Bliss in this example.
Let’s get started.
Step 1. Take a copy of your site
From the WordPress website you want to move, go to your plugins, search for Backup Migration, install, and activate.

Head over to the plugin settings, and you’ll see the backup options. You can either create a backup now or set up scheduled backups. This can be a handy feature once you’ve moved your site to the new host.
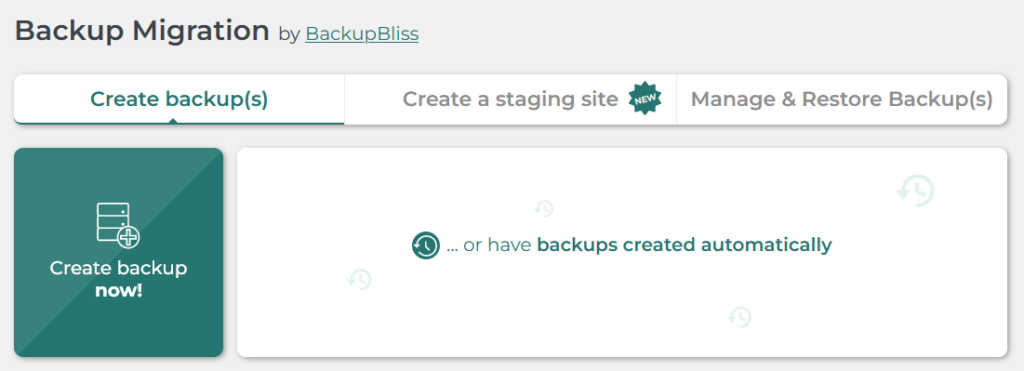
Below are some configuration options, but these can be left as default. For now, go ahead and click the Create Backup Now button.
You’ll see a popup letting you know the backup size:
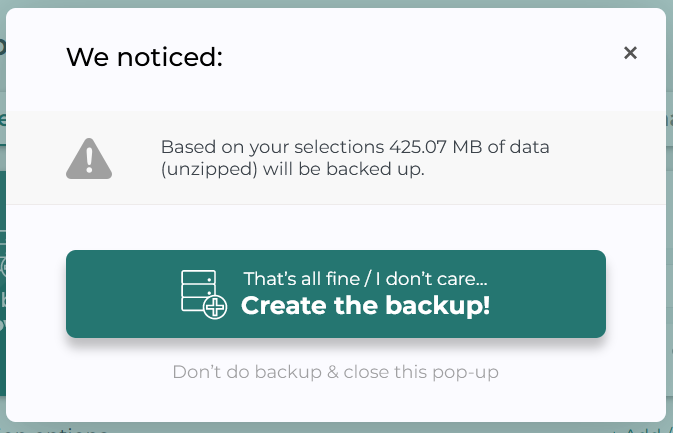
Click the button, and the backup process will begin:
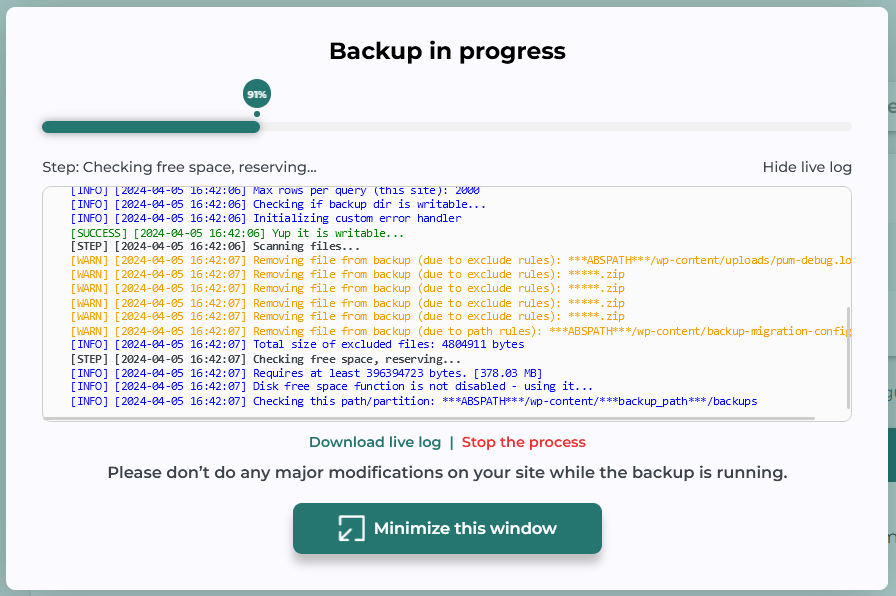
You’ll see a confirmation popup once the backup is complete:
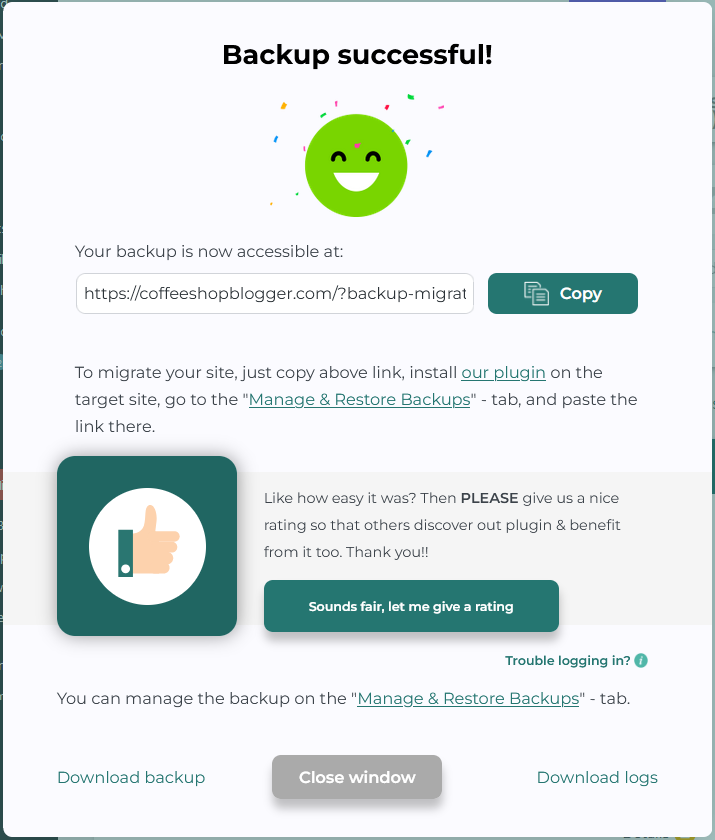
Now you have two options, you can either use the super-quick migration link or download the Zip file.
I’ll show you how to do both in the next step.
Step 2. Restore your site on the new web host
From the previous step, click on the copy button to copy the super-quick migration URL.
Go to your new WordPress installation on your new web host and install and activate the plugin.
Then click on the Manage & Restore Backups tab:
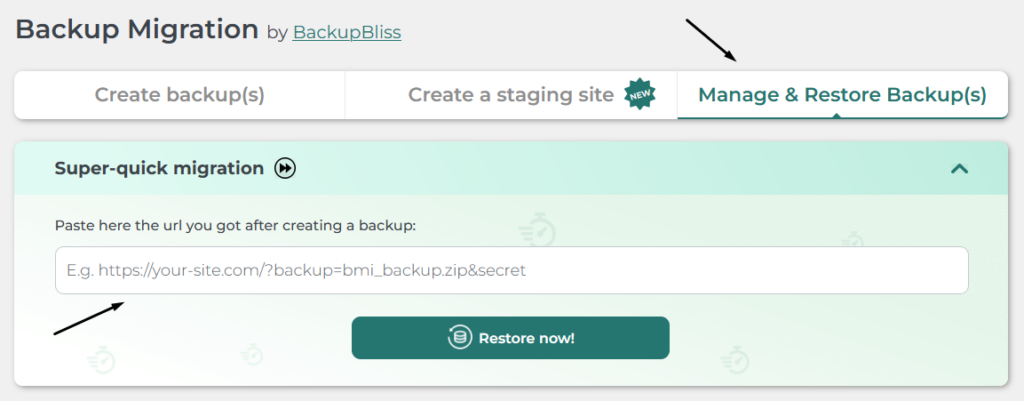
Paste the URL in the box and click on Restore.
If you need to copy the URL again, you’ll find it from the same tab on your main site. Just click the button to copy it:

The migration process will start just by pasting in the URL and clicking a button!
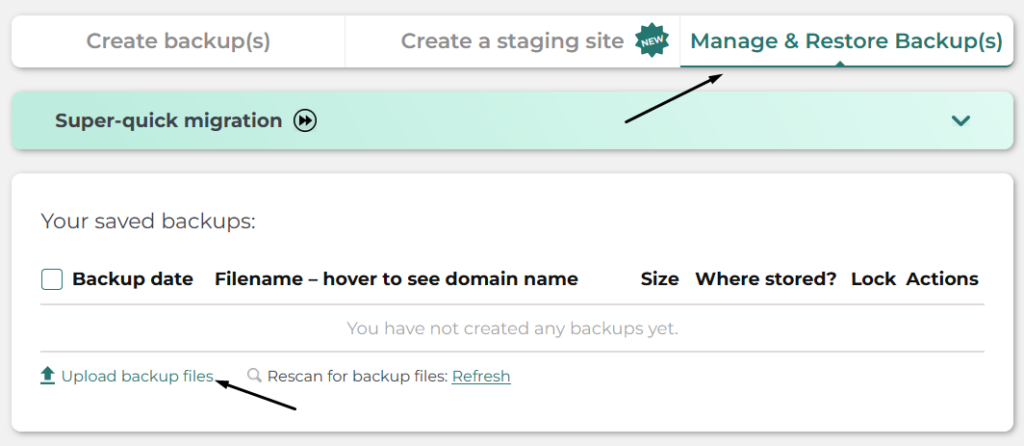
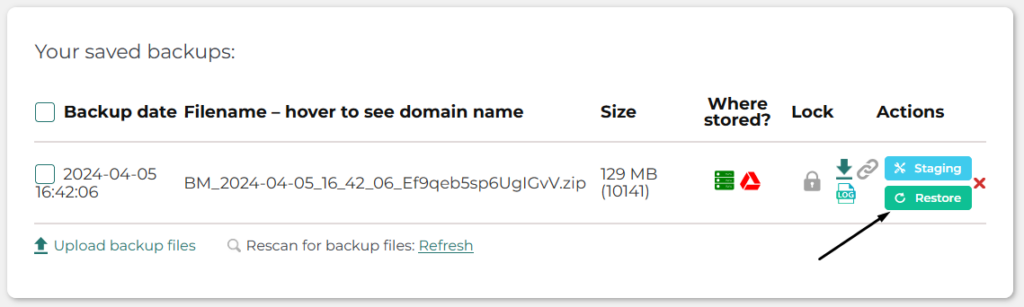
The other option is to upload the backed-up ZIP file. You can download it from your main site here:
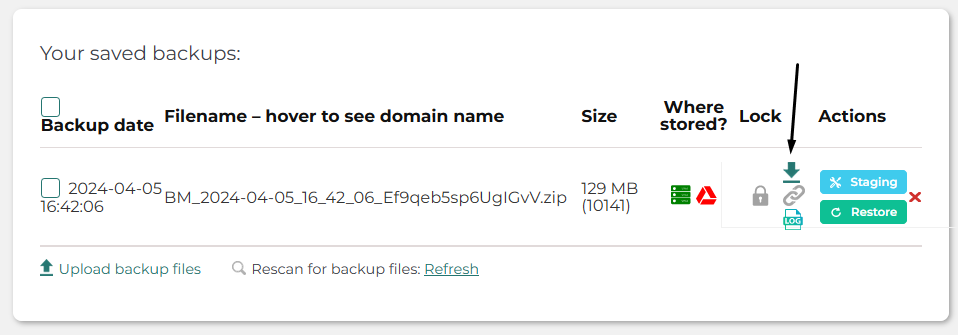
Then upload it to the new site here:
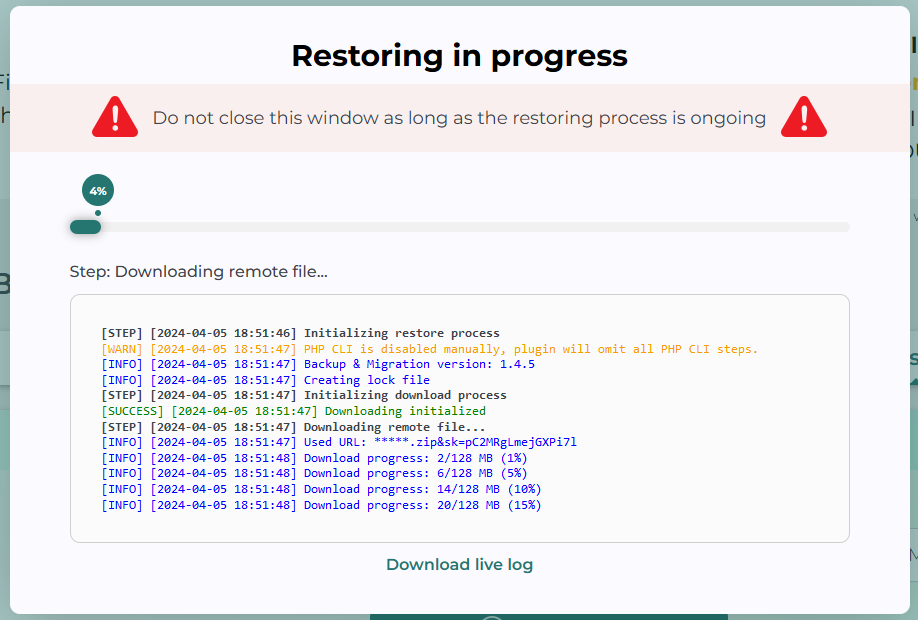
Once the backup has been added to the new installation, you can restore it by clicking the restore button:
Once the migration process is done, you’ll get a popup notification:
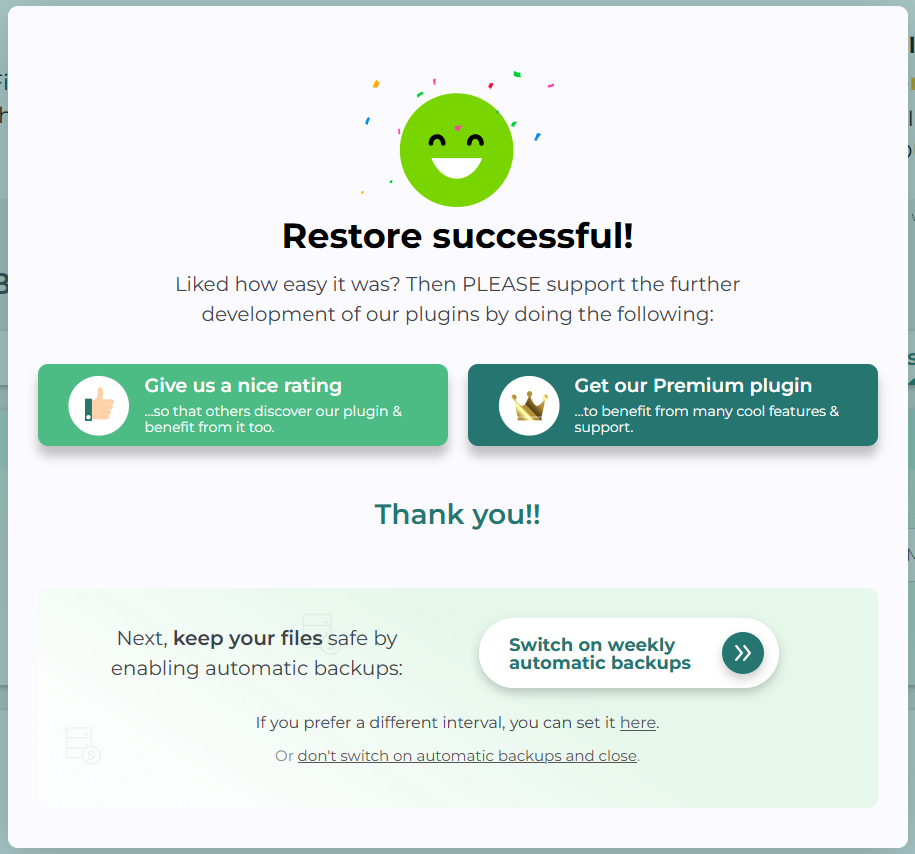
Now you can check the front end of your site to make sure everything looks the same. It should be an identical copy.
The last step is to update your nameservers, which I go into below.
How to Migrate WordPress Manually
If you’d prefer to migrate your site manually, here are the steps involved.
Step 1. Connect to your server through FTP
First, connect to your hosting server through FTP by adding your credentials to an FTP client. I’m using FileZilla, which is free.
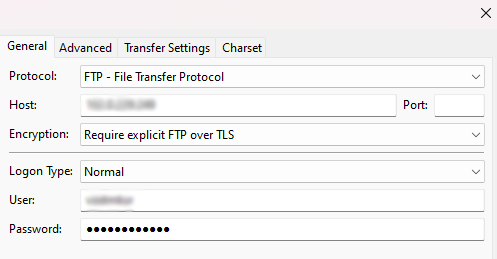
The FTP credentials are often your cPanel username and password, or you can create additional FTP accounts:
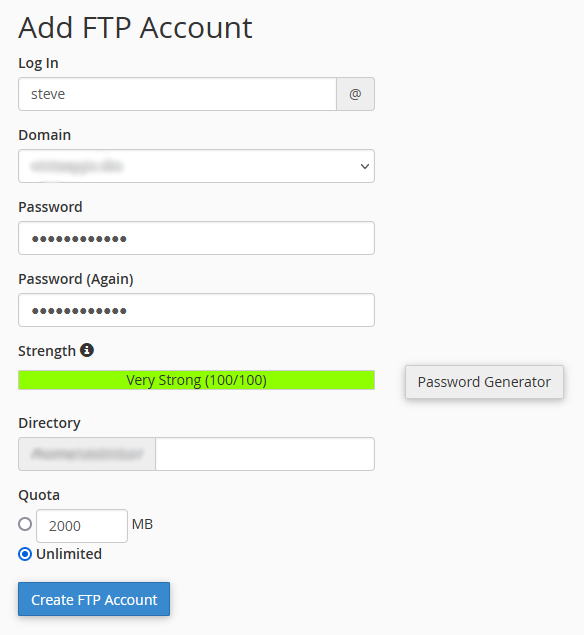
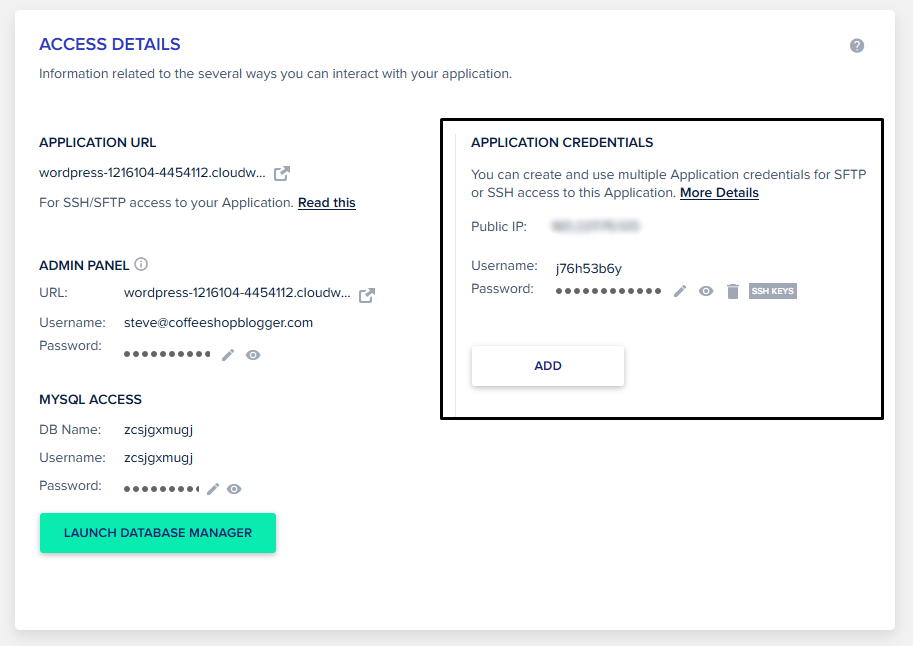
Other hosting environments might have a different way of creating FTP accounts, such as Cloudways, for example:
Step 2. Download your WordPress files
Once you’re connected to your server, you can download the files you need to move:
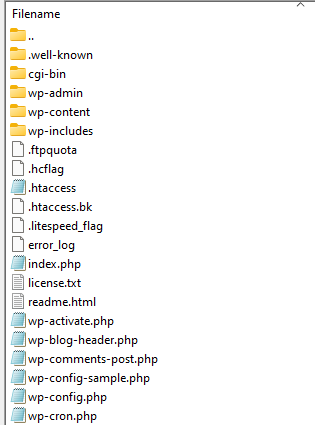
Here are the files you’ll need to download:
- .htaccess
- wp-config.php
- wp-content folder
Some of the wp-contents folder might already exist in your new WordPress installation, but it’s a good practice to download the whole folder contents.
Store the files and folder on your PC, ready for uploading to your new host.
Step 3. Install WordPress on your new hosting
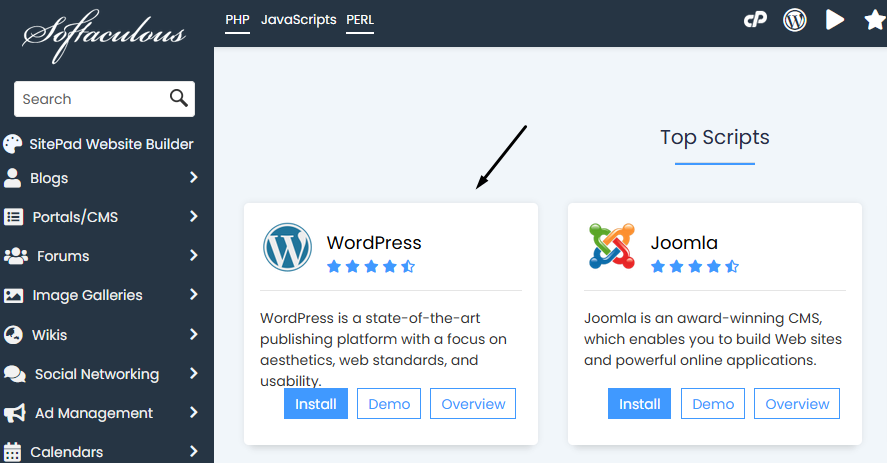
If you haven’t done so already, you’ll need to install WordPress on your new web host. This can be done by using a 1-click installer if you’re using cPanel.
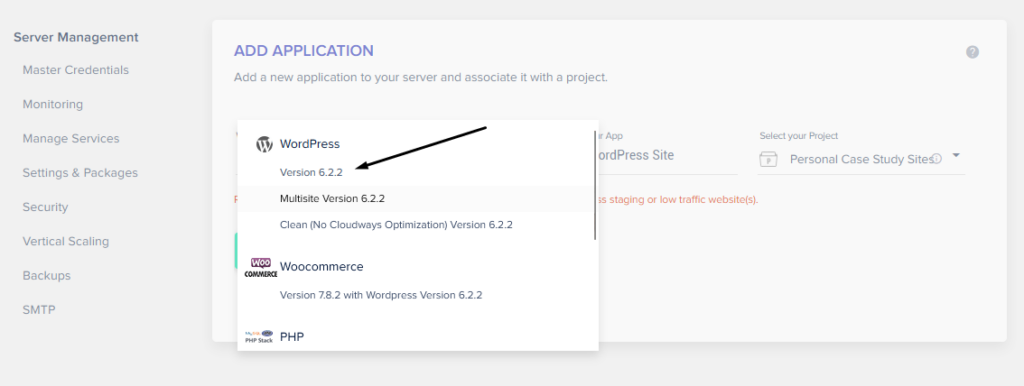
Or, if you’re using Cloudways, you choose WordPress as the application:
You don’t need to log into the WordPress dashboard yet, as you’ll be uploading the files and replacing the database in the next steps.
Step 4. Upload your files through FTP
Connect to your new hosting server through FTP again and start uploading your files. The most important ones are those in the wp-content folder:

Step 5. Create and import your database
Now you need to create a WordPress database and import your existing site to the new database.
In your old host, if you’re using cPanel, go to PHPMyAdmin, select your database, and click on export:
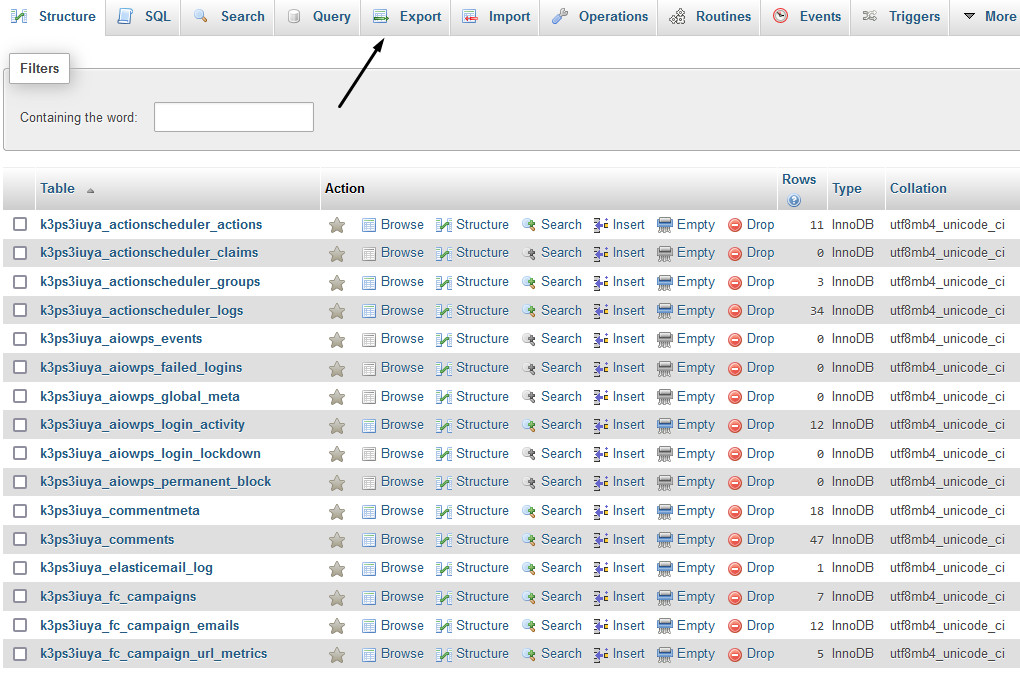
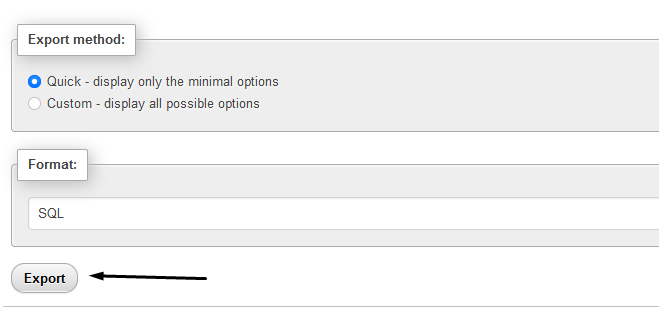
Leave the settings as they are and click on Export:
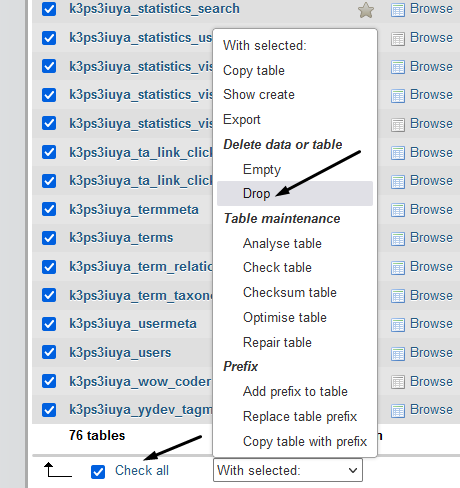
Then if a database was automatically created in your new hosting account, you’ll need to delete all the tables:
Next, go to the import tab and select the exported SQL file you downloaded earlier:
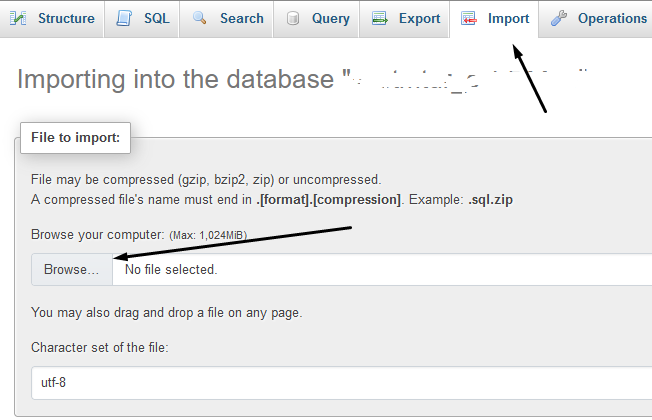
Click Import at the bottom of the page, and you’re done with this step.
Step 6. Configure the WordPress config file
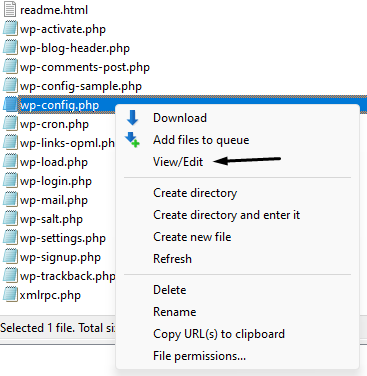
The final step requires you to adjust the settings in the wp-config.php file in your new server.
Right-click on it in your FTP client and click edit:
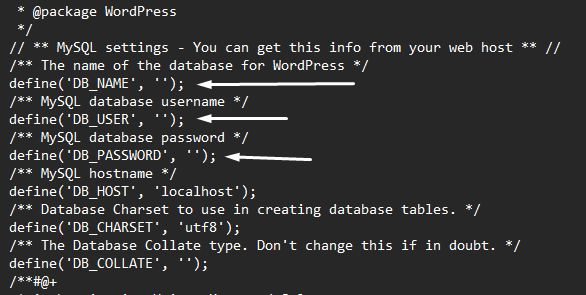
You’ll need to make sure the database settings match up with your new database credentials:
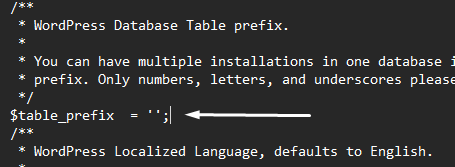
You also need to make sure the database prefix matches the one in your uploaded database:
Save the file, and you’re done with the manual WordPress migration.
Hopefully, your new web host has a temporary domain name you can check to see if your site is loading correctly.
This can be done in Cloudways and many other hosting companies.
Update Your Nameservers or DNS Records
Now that your WordPress files and database have been migrated to your new hosting provider, you can now change your nameservers.
This connects your domain name to your hosting account and displays your website in the browser.
First, you’ll need your nameservers which you will have access to from your new hosting provider. They look something like this:
- ns31.registrar.com
- ns32.registrar.com
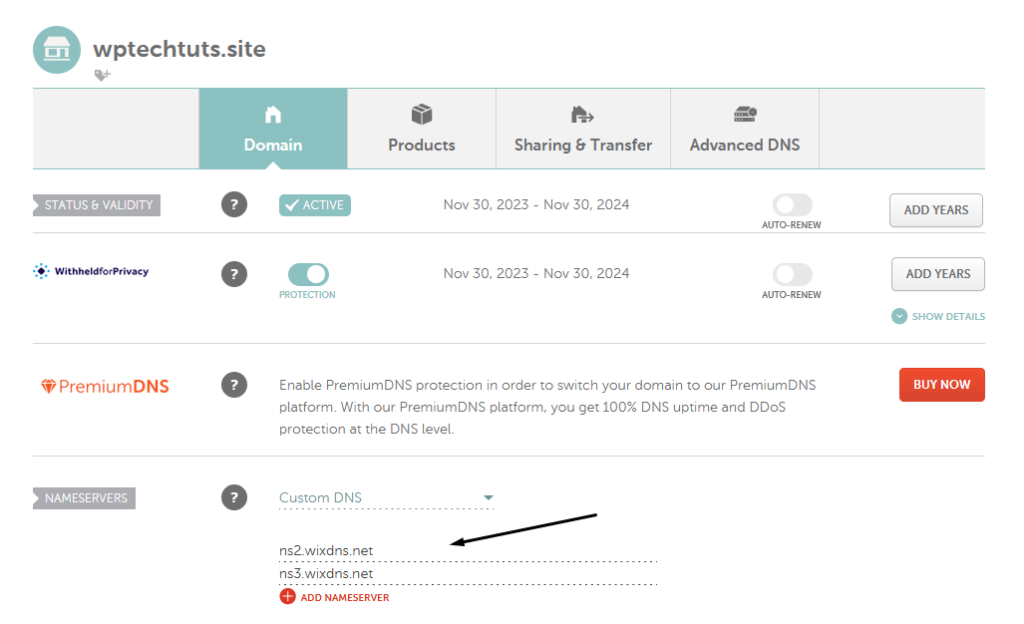
Second, log into your domain registrar, access your domain settings, and enter your nameservers:
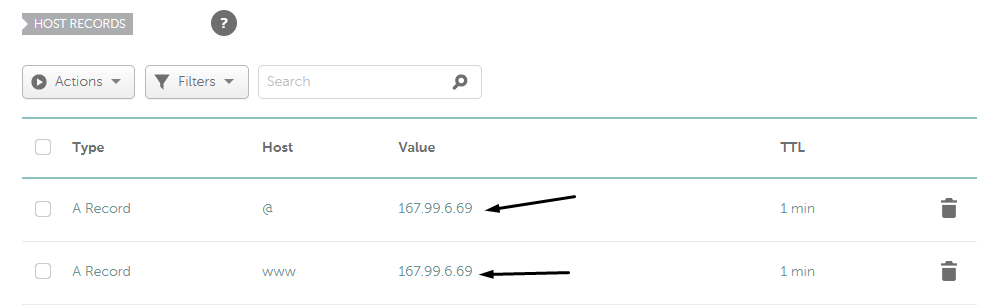
Alternatively, if you’re using VPS hosting, you’ll get an IP address to add to your DNS records.
Simply add two A records, one as @ or blank and the other as www:
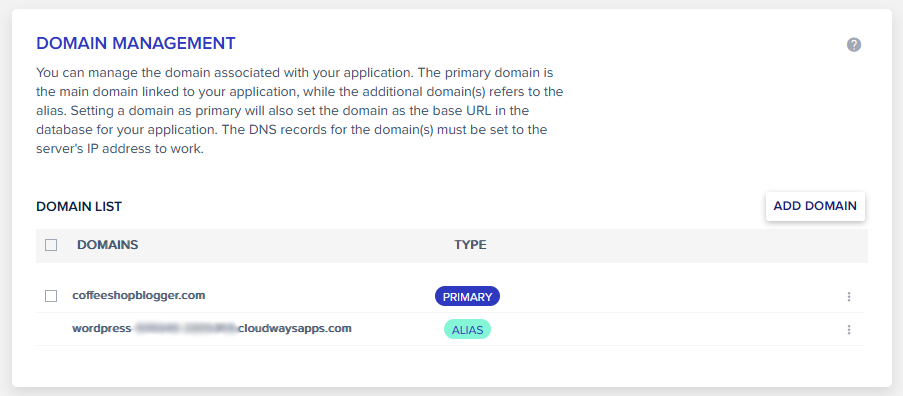
You can then set your domain name in your VPS or cloud hosting account like this:
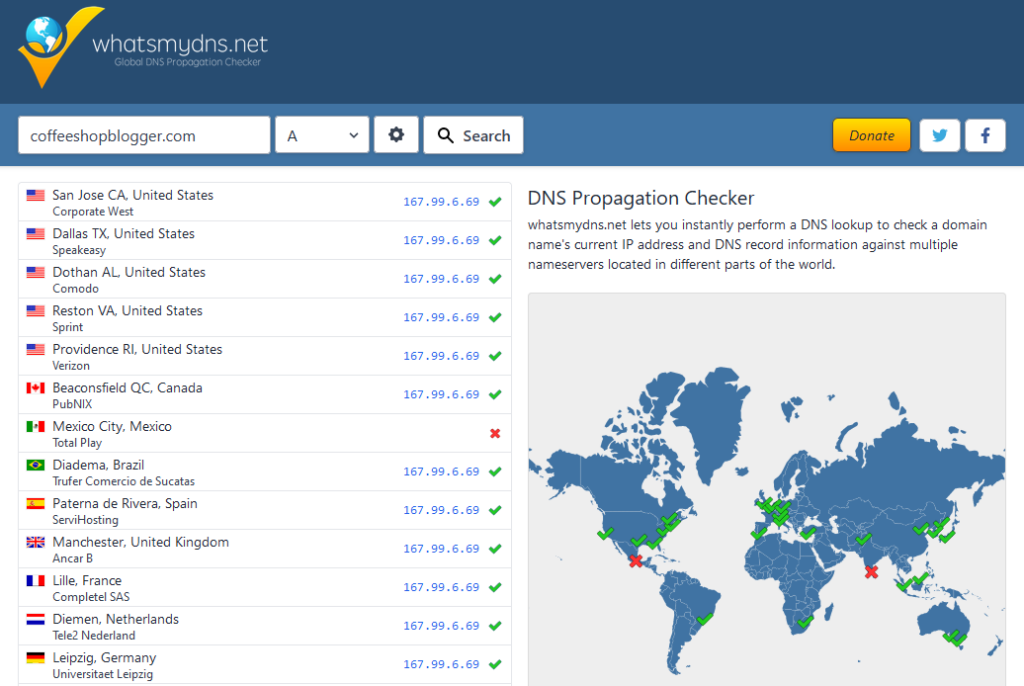
That’s it! DNS propagation can sometimes take several hours to complete, but in many cases, it will switch over in minutes.
You can check if things have switched over by checking your domain name on this site:
Lastly, you might need to clear your browser to clear its cache and load the site from its new location.
Web Hosts with Dedicated WordPress Migration Plugins
If you want a WordPress migration plugin that’ll work with any web host, then make sure you read on to the next section.
But in this section, I’ve included a list of web hosts that have dedicated migration plugins.
Migrating to one of these WordPress hosts makes the whole process easier as they are built for that specific hosting environment.
- WP Engine: WP Engine has a plugin called WP Engine Automated Migration that makes it super easy to copy your site to their hosting service.
- Cloudways: The Cloudways WordPress Migrator is what I used in the example above, so if you want to use Cloudways, you can use this plugin to copy the files over easily.
- SiteGround: If you want to use SiteGround, then you can use their dedicated migration plugin SiteGround Migrator.
- DreamHost: DreamHost is another popular hosting company with its own migration plugin called DreamHost Automated Migration.
- Liquid Web and Nexcess: Migrate To Liquid Web & Nexcess plugin works on both of these hosting companies as they’re owned by the same parent company.
3 WordPress Migration Plugins to Migrate WordPress to Any Web Host
If you’re not using one of the above web hosts, there are plenty of other migration plugins to choose from.
Here are some of the best free WordPress plugins for migrating your site to another host.
Backup Migration
Backup Migration is the plugin I used in this guide. I chose it because it offers many free features that aren’t available in other plugins.
I like that it gives you the option to download and import a ZIP file or copy your site over with a URL.
This feature known as Super-Quick migration provides you with a unique URL that you can use to copy the backup over to your new WordPress installation.
The free version of Backup Migration also supports sites up to 2GB, which is better than other options.
It can also be used as a WordPress staging plugin and to store automatic backups in several cloud services, such as:
- Google Drive
- One Drive
- FTP
- Google Cloud
- Amazon S3.
All-in-One WP Migration
All-in-One WP Migration is one of the most popular migration plugins for WordPress. With more than 5 million active users, it’s a great choice for moving your site to a new web host.
It works by exporting your site as a downloadable ZIP file and uploading it to a new WordPress installation. It also offers cloud storage in the premium version and unlimited file size.
The only disadvantage is that it only allows uploads of sites up to 512MB and exporting to files in its free version.
To increase the import limit, you’ll need the Unlimited Extension or one of the cloud storage extensions. Paid extensions start from $69 per year for one site.
Migrate Guru
Migrate Guru works a bit differently from other WordPress migration plugins and aims to simplify the process.
You select the web hosting environment you want to move your site to, enter your credentials, and everything is copied over in the background.
There’s no need to export or import large ZIP files or log into multiple WordPress installations.
You simply add the destination site URL, IP address, and cPanel username and password and sit back until it’s done.
It’s also suitable for larger sites up to 200GB and won’t overload your server. What’s best is Migrate Guru is 100% free.
WordPress Migration in Conclusion
WordPress migration might seem like an arduous task at first, but when you follow the steps in this post, it becomes second nature.
Just make sure you back up your site before you begin and choose a decent WordPress host, and you’ll be good to go.
Better still, choose a host like Iridium Hosting, and they will migrate your site for you.